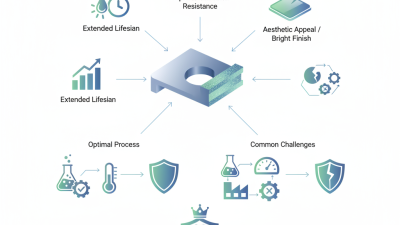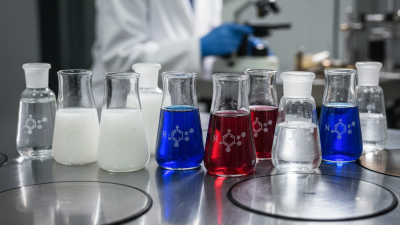
Acid Zinc Electroplating remains a practical choice for protecting steel components against corrosion while creating a clean, uniform finish. Its performance depends on more than bath chemistry. Surface preparation, current density, temperature, filtration, and post-treatment must work together. The European Commission’s Best Available Techniques Reference Document for Surface Treatment of Metals and Plastics identifies rinsing control, drag-out reduction, and wastewater management as important process priorities. The U.S. Environmental Protection Agency’s Metal Products and Machinery Effluent Guidelines also highlight the need for disciplined control of metal-bearing wastewater.
Frank Altmayer, a recognized electroplating consultant and educator, often emphasizes this principle: “Process control matters more than luck.” That idea fits acid zinc production closely. A bright panel may look successful, yet hidden problems can remain. Poor cleaning can cause blistering. Excessive brightener can create brittle or uneven deposits. Weak agitation may leave dark areas inside recesses. Small changes matter.
This guide, “What Are 7 Acid Zinc Electroplating Tips?”, focuses on practical decisions that operators can verify at the tank. It examines cleaning, bath analysis, anode condition, current distribution, temperature, rinsing, and final protection. The approach is evidence-based, but not perfect. Shop conditions differ. Equipment ages. Measurements can be misleading when sampling is inconsistent. Careful records, repeated tests, and honest troubleshooting still provide the strongest path toward stable quality, lower rework, and more reliable corrosion resistance.
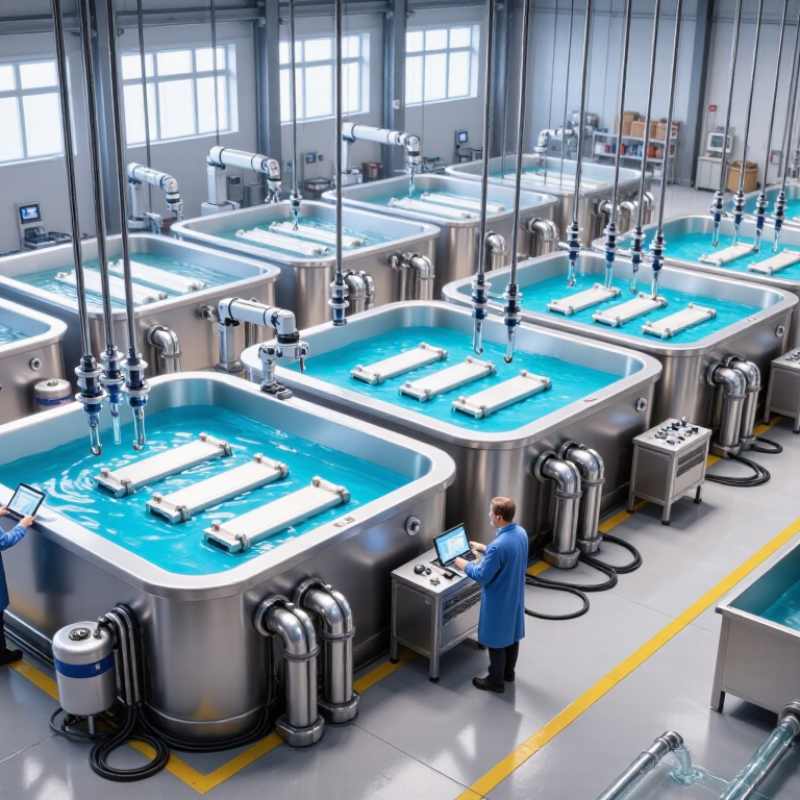
Acid zinc electroplating deposits a protective zinc layer on conductive metal surfaces. The process needs clean chemistry, stable electrical control, and careful inspection.
Clean metal matters. Remove oil, rust, and oxide before plating, because contamination causes peeling or dark patches. Use a suitable alkaline cleaner, followed by controlled acid activation. Rinse thoroughly between every stage. Residual cleaner can disturb the plating bath.
Monitor the bath regularly. Check zinc concentration, pH, temperature, and additive balance according to the process specification. Small changes matter. Excessive current density may create burning at edges, while low current can produce dull coverage. Keep anodes positioned evenly around the workpiece. Gentle solution movement helps reduce gas marks and improves thickness distribution.
Control the rack design and part spacing. Poor contact can create thin areas or skipped sections. Measure coating thickness at several locations, not only on easy-to-reach surfaces.
A practical seven-point routine includes cleaning, activation, rinsing, bath control, current control, agitation, and inspection.
That sounds simple, but production conditions rarely stay perfect. Operators should record unusual color changes, temperature drift, and contact resistance instead of relying on appearance alone.
Acid zinc can introduce hydrogen into some high-strength steels. Follow the applicable engineering specification for post-plating treatment and testing. Wear suitable protective equipment, provide ventilation, and handle acidic solutions through approved workplace procedures. Damage often begins with one overlooked rinse.
What Are 7 Acid Zinc Electroplating Tips?
Preparing the Metal Surface for Consistent Coating
Acid zinc electroplating depends on surface preparation more than many operators expect. A bright bath cannot hide oil, oxide, or polishing residue. Shop-floor checks should begin with incoming metal. Identify the alloy, heat scale, weld discoloration, and deep scratches. Different surfaces need different cleaning strength.
Degrease with a controlled alkaline cleaner, keeping temperature, concentration, and contact time within the process sheet. Rinse thoroughly. Then inspect the water film. It should sheet evenly, not break into beads. Beading often signals oil remains. Mechanical abrasion can expose fresh metal, but excessive pressure may embed grit or round sharp edges. Use clean, compatible media, and remove dust before activation. An acid dip should be brief and monitored. Over-pickling can roughen steel and increase hydrogen absorption risk. That detail is easy to miss.
Keep racks, hooks, and contact points bright and secure. Poor electrical contact creates thin areas, burning, or patchy color. Avoid touching prepared parts with bare hands. Even a fingerprint matters. Place cleaned parts into the plating bath without delay, because flash rust can form quickly in humid air. Record cleaner temperature, rinse quality, activation time, and visual defects for each batch. Do not trust appearance alone. Water-break checks and thickness measurements reveal problems earlier. Some lines still skip these records, and that is a weakness worth correcting.
Use these commonly applied process-time windows as starting points for surface preparation. Actual settings should be validated against the substrate, soil load, bath chemistry, and supplier specifications.
Key takeaway: Consistent acid zinc coating begins with complete degreasing, controlled electrocleaning, thorough rinsing, brief acid activation, clean handling, and rapid transfer into the plating bath. Excessive activation or delays after rinsing can increase staining, flash rust, or poor adhesion.
Controlling bath chemistry and operating conditions starts with measurement, not guesswork. Keep zinc concentration within the supplier’s validated range, commonly about 20–40 g/L for acid chloride baths. Maintain pH near 4.5–5.5, because small shifts can change brightness, burning, and deposit coverage. Record temperature every hour; many acid zinc lines operate around 20–35°C. Temperature drift is easy to miss. It still matters.
Control chloride concentration, additive levels, and metallic impurities through scheduled analysis. Excess iron or copper may create rough deposits and poor adhesion. Filter continuously when possible, but inspect the filter cartridge for unusual sludge. Agitation should move solution across recessed areas without disturbing the workpieces.
Keep current density stable, especially during rack loading. An unstable rectifier can produce uneven thickness even when the bath appears healthy. ASTM B633-23 identifies zinc coating thickness classes from 5 to 25 μm, so verify thickness with calibrated instruments rather than visual brightness alone.
Rinsing also controls bath life. Use clean counterflow rinses and monitor conductivity at the final rinse. The European Commission’s Surface Treatment of Metals and Plastics BREF emphasizes efficient rinsing and chemical control to reduce drag-out and wastewater loading.
Check anodes, contacts, and barrel movement before changing additives. I have seen operators correct a dull finish by adding brightener, although poor contact caused the defect. That mistake is costly. Review trend charts weekly, compare Hull-cell panels with production parts, and adjust one variable at a time. Not every defect has a chemistry cause.
Improving plating uniformity, adhesion, and appearance starts with surface preparation. In shop trials, I have found that cleaning is often the weakest link. Remove oil, scale, and fingerprints before activation. A short acid activation can help, but excessive exposure may attack the base metal. Rinse thoroughly between every stage. Even a small amount of cleaner carried into the plating bath can disturb deposit quality.
Keep the bath within its tested pH and temperature range. Small changes can affect brightness and coverage. Control current density carefully, especially on sharp edges and recessed areas. Lower current often improves coverage in deep features. Use steady solution movement and adequate filtration to reduce cloudy deposits. Check anodes, electrical contacts, and racking points before production. Poor contact creates thin areas that may appear only after corrosion testing.
Maintain consistent spacing between parts and anodes. This simple adjustment can improve thickness distribution. Measure coating thickness at edges, centers, and recesses, not only on easy surfaces. Inspect adhesion with a suitable test after rinsing and drying. A bright finish is not proof of strong bonding. I still see attractive parts fail because pretreatment was rushed. Keep written records for pH, temperature, current, and inspection results. Trends usually reveal problems earlier than visual checks. One more practical detail: avoid overloading the rack. Parts need room for solution flow.
Acid zinc plating can look acceptable at first glance, yet small defects often reveal process instability. Inspect the finish under neutral white light, not colored workshop lamps. Tip 1: Rotate each part slowly and check edges, holes, and recessed areas. Tip 2: Use a thickness gauge across both flat and difficult surfaces. Uneven coverage often explains early corrosion. Tip 3: Test adhesion on a sample part before approving the full batch. A clean, continuous surface matters more than excessive brightness.
When defects appear, compare them with recent bath and production records. Tip 4: Investigate dark edges by checking current density, racking, and sharp corners. Burn marks usually develop where electrical flow becomes concentrated. Tip 5: Treat cloudy or pale areas as possible contamination, poor cleaning, or unstable chemistry. Do not correct the bath blindly. Tip 6: For pits, inspect filtration, agitation, and the incoming metal surface. Tiny trapped bubbles can leave visible holes. They are easy to miss.
Tip 7: Review white rust after controlled humidity exposure, then inspect the zinc layer and passivation condition. Measure before changing settings. A pale patch fooled me once; the bath was stable, but the part carried oil into cleaning. My inspection was incomplete. Keep dated photographs, thickness readings, and defect locations for every trial. This evidence supports practical decisions and helps separate operator error from equipment or chemistry problems.
| Tip and Process Area | Recommended Control Point | How to Inspect | Typical Acceptance Check | Common Defect | Likely Cause | Troubleshooting Action |
|---|---|---|---|---|---|---|
| 1 Control Bath Chemistry | Keep the chloride-zinc bath within the approved operating window. A commonly used starting range is approximately pH 4.8–5.5, but the supplier's process specification should take priority. | Test pH at least once per shift with a calibrated meter. Analyze zinc and chloride concentration with a documented laboratory method. |
Stable pH and metal concentration No sudden change in deposit appearance, coverage, or current efficiency. |
Dull, rough, dark, or uneven deposits; poor coverage in low-current-density areas. | Incorrect pH, depleted zinc or chloride, excessive metallic contamination, or inaccurate chemical additions. | Stop unverified additions, retest the bath, correct chemistry gradually, and record the adjustment. Investigate contamination before increasing brightener. |
| 2 Prepare and Clean the Parts | Remove oil, grease, oxide, scale, and fingerprints before plating. Cleaning should be compatible with the substrate and part geometry. | Perform a water-break test after rinsing. Inspect representative parts under good lighting for oil film, staining, or visible scale. | A continuous water film should remain on the surface for several seconds rather than separating into droplets. | Bare spots, peeling, blistering, skip plating, or poor adhesion. | Incomplete alkaline cleaning, inadequate electrocleaning, poor rinsing, excessive delay before plating, or oxide remaining on the substrate. | Verify cleaner concentration, temperature, time, agitation, and current. Improve rinsing and activate the surface immediately before zinc plating. |
| 3 Optimize Current Density | Use the approved current-density range for the bath and part geometry. A practical starting range for many acid zinc systems is about 1–4 A/dm². | Confirm rectifier output, calculate the active surface area, and compare actual amperage with the planned current density. Use a Hull cell when diagnosing bath behavior. | Deposit should be bright and uniform without burnt edges or thin recessed areas. | Burning at edges, roughness, excessive brightness, or thin coating in holes and recesses. | Current density too high, poor part spacing, inadequate anode arrangement, or insufficient solution movement. | Reduce amperage, increase spacing, improve rack loading, shield high-current areas, or improve agitation. Confirm the revised setting with thickness measurements. |
| 4 Maintain Temperature and Agitation | Keep bath temperature consistent; many chloride acid zinc processes operate near 20–35°C, depending on the chemistry. Maintain uniform solution movement. | Record temperature at several points in the tank. Observe air or mechanical agitation and check for stagnant zones around the load. | The temperature difference across the working zone should be small, and the deposit should show consistent color and brightness. | Cloudy appearance, patchy brightness, roughness, or inconsistent thickness from one area of the load to another. | Overheating, inadequate mixing, blocked agitation lines, excessive load density, or localized depletion of additives. | Restore uniform agitation, correct heater control, reduce the load size, and verify that tank circulation reaches recessed and shielded areas. |
| 5 Inspect Thickness and Coverage | Define the required zinc thickness by drawing, corrosion requirement, and end use. A common engineering requirement may be around 8–12 µm, but the product specification must govern. | Use a calibrated X-ray fluorescence instrument or another suitable coating-thickness method. Measure high-, mid-, and low-current-density locations. | All required measurement points meet the specified minimum thickness, with acceptable variation across the part. | Thin coating in recesses, excessive buildup on edges, or coating below the specified minimum. | Incorrect current calculation, poor racking, unsuitable anode-to-part distance, short plating time, or inadequate solution circulation. | Recalculate surface area, improve part orientation and contact, adjust current or time, and use auxiliary anodes or shields when the geometry requires them. |
| 6 Check Appearance and Adhesion | Inspect after rinsing and before any conversion coating. The surface should be continuous, firmly attached, and free from visible nodules or stains. | Use visual inspection under consistent lighting. Where required by the specification, perform an adhesion test appropriate for the substrate and coating system. |
Uniform metallic appearance No blistering, flaking, powdery areas, pits, nodules, or exposed base metal. |
Peeling, blistering, flaking, pits, nodules, water stains, or a gray-to-black color shift. | Poor pretreatment, hydrogen bubbles, particulate contamination, excessive brightener, high current density, or inadequate rinsing. | Check the cleaning and activation sequence first. Filter the bath, remove sludge, improve rinsing, and verify current density before changing additive levels. |
| 7 Control Rinsing and Post-Treatment | Use clean, well-maintained rinse stages. Dry parts promptly and apply the specified passivation or sealer when corrosion protection requires it. | Monitor rinse conductivity or contamination trend, inspect for stains after drying, and verify post-treatment coverage and color consistency. | No white residue, discoloration, water spots, or handling marks. Corrosion-performance testing should meet the product requirement when specified. | White rust, water stains, iridescent variation, premature corrosion, or inconsistent passivation color. | Contaminated rinse water, trapped solution, excessive drying temperature, poor drainage, insufficient post-treatment, or damaged conversion film. | Refresh or improve counterflow rinses, add drainage time, reduce carryover, control drying conditions, and verify the post-treatment bath concentration and pH. |